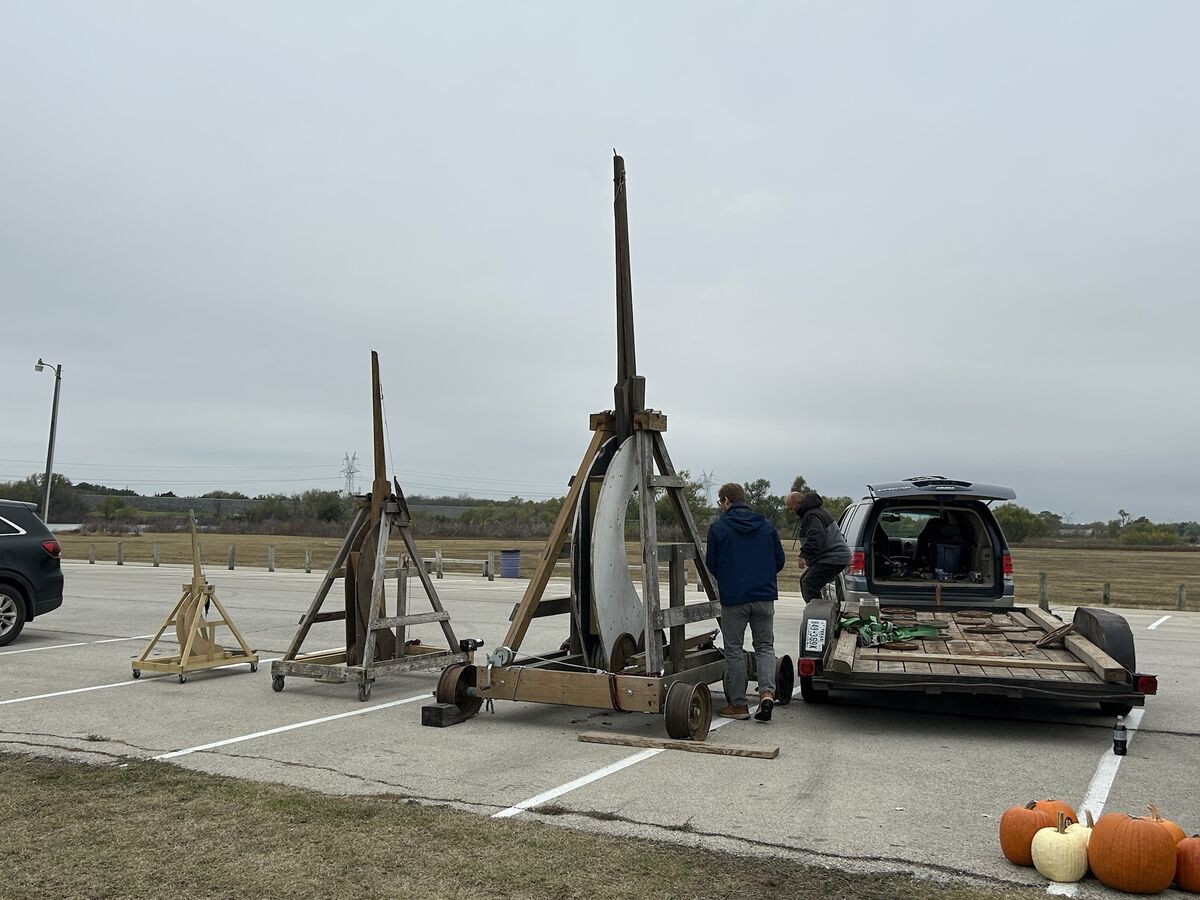
2025 Lewisville Punkin Chunkin
A Day of Flying Pumpkins and Flying Fun What do you get when you combine medieval siege engines, autumn gourds, and a beautiful lakeside setting? The 2025…
· 5 min read
A Day of Flying Pumpkins and Flying Fun What do you get when you combine medieval siege engines, autumn gourds, and a beautiful lakeside setting? The 2025…

Yes, I work for Microsoft. No, I do not like PowerPoint. Here’s my alternative with the source code which I’ll explain here. For a live example, check out…
As Azure customers and partners build bigger and more complex solutions in their subscriptions, you might hit quota and throttling issues. These can be irksome and cause confusion. This article will walkthrough some of the scenarios I’ve seen and how to design with them in mind. Let’s make sure we’re on the same page regarding terminology used in this article: Azure Resource Manager (ARM) - The management layer and API behind all Azure resources Resource Provider (RP) - Each resource type inside Azure has a RP which allows you to manage that resource (e.g. Storage, Key Vault, VMSS, etc.) Quota - the maximum number of a specific resource available for your subscription. Similar to a credit card limit Examples: Subscription or Resource Quota Max RPS for Storage account Max size of single blob container Azure Function default timeout Maximum # of VMs in a VMSS Some quotas have adjustable and non-adjustable quotas Some adjustable quotas can be managed programmatically using the Azure Quota Service API Throttling - maximum number of API requests you can make in a certain period. Similar to bandwidth throttling NOTE: There are subscription and tenant level throttling limits. Each Storage, Networking, Compute and Azure Resource Graph also have throttling limits NOTE: Throttling for RP’s are per subscription per region Examples: Rate limit of writes to a subscription per hour Rate limit of Deleting a VMSS in 3 min Managing Quotas Because quotas are mostly static, viewing your quotas is pretty simple. Simply to go the Azure Portal and click on “My quotas”. If you need to increase your quota, you might need to open an Azure Support ticket. For example, if you need to start deploying in a new region, you might need to open a ticket to increase the “Total Regional vCPUs” and “VMSS” quotas in “West Central US”. Once the ticket has been approved, the quota will be available to you. Managing Throttling For the most part, you won’t need to worry about throttling, but if you’re doing very large scale deployments with LOTS of constant churning of resources, you might hit throttling limits. These limits are less about the number of resources, but HOW you use the resources. For example: You can have 5000 AKS cluster in one subscription, each AKS cluster can have a maximum of 100 node pools. If you try creating the max # of AKS clusters with the max # of node pools simultaneously, then you’ll definitely hit the throttling limit. Some OSS projects aggressively call ARM and the RP API’s in a reconciliation loop. Multiple instances of these projects will also hit the throttling limit. Since throttling is specific to the current time window, it can be trickier. There’s no “hard formula” for when you’ll hit a threshold. But when you do, you’ll probably start seeing 429 HTTP status responses. Throttling Examples Thankfully, you can get insights into your current throttling status by looking at response headers for the requests. x-ms-ratelimit-remaining-subscription-reads - # of read operations to this subscription remaining x-ms-ratelimit-remaining-subscription-writes - # of writes operations to this subscription remaining x-ms-ratelimit-remaining-resource - Compute RP specific header, which could show multiple policy statuses. (see “Read Request for GETting a VMSS” below for details) Let’s dig into this deeper using the Azure CLI. Example: Create a Resource Group (Write Request) Because this request creates a RG, it will count against our subscription writes: ? az group create -n $RG --location $LOCATION --verbose --debug --debug 2>&1 | grep 'x-ms' DEBUG: cli.azure.cli.core.sdk.policies: 'x-ms-client-request-id': '' DEBUG: cli.azure.cli.core.sdk.policies: 'x-ms-ratelimit-remaining-subscription-writes': '1199' DEBUG: cli.azure.cli.core.sdk.policies: 'x-ms-request-id': '' DEBUG: cli.azure.cli.core.sdk.policies: 'x-ms-correlation-request-id': '' DEBUG: cli.azure.cli.core.sdk.policies: 'x-ms-routing-request-id': 'SOUTHCENTRALUS:20230512T163152Z:' NOTE: The key point is how the x-ms-ratelimit-remaining-subscription-writes is now 1199 (instead of the standard 1200 per hour as per the Subscription and Tenant limits) Example: GET a VMSS (Read Request) This request performs a GET (read) request on an existing VMSS. This is similar to the write request for the RG, but since Compute RP also has a separate set of throttling policies, it also counts against the Compute RP limits. `markdown ? az vmss show -n $VMSS_NAME -g $RG --debug 2>&1 | grep x-ms DEBUG: cli.azure.cli.core.sdk.policies: 'x-ms-client-request-id': '' DEBUG: cli.azure.cli.core.sdk.policies: 'x-ms-ratelimit-remaining-resource': 'Microsoft.Compute/GetVMScaleSet3Min;197,Microsoft.Compute/GetVMScaleSet30Min;1297' DEBUG: cli.azure.cli.core.sdk.policies: 'x-ms-request-id': '' DEBUG: cli.azure.cli.core.sdk.policies: 'x-ms-ratelimit-remaining-subscription-reads': '11999' DEBUG: cli.azure.cli.core.sdk.policies: 'x-ms-correlation-request-id': '' DEBUG: cli.azure.cli.core.sdk.policies: 'x-ms-routing-request-id': 'SOUTHCENTRALUS:20230512T162738Z:'` NOTE: The key point is how x-ms-ratelimit-remaining-resource has two key-value pairs: Microsoft.Compute/GetVMScaleSet3Min;197 - I ran this command before, so I have 197 requests available in the 3 minute window for performing GET requests on the VMSS resource Microsoft.Compute/GetVMScaleSet30Min;1297 - I now have 1297 requests available in the 30 minute window for performing GET requests on VMSS resources NOTE: x-ms-ratelimit-remaining-subscription-reads doesn’t seem to decrease (11999). Even if I run the same command again. I haven’t figured that out yet. Designing with quotas and throttling in mind Most Azure deployments won’t need this type of fine tuning, but just in case, there’s some documented Throttling Best Practices as well as my personal pro-tips: Use the Azure SDK, as many services have the recommended retry guidance built-in Instead of creating and deleting VMSS (which consume multiple VMSS API requests), scale the VMSS to 0 (which only consumes 1 VMSS API request) Any type of Kubernetes cluster auto-scaler will perform a reconciliation loop with Azure Compute RP. This could eat into your throttling limits Use the Azure Quota Service API to programmatically request quota increases If you’re unable to workaround the throttling limits, then the next step is to look at the Deployment Stamp pattern using multiple subscriptions. You can programmatically create subscriptions using Subscription vending. Hopefully this article has helped you understand quotas limits and throttling limits in Azure, and how to work around them. Let me know if you have any additional questions and/or feedback and I can follow-up with additional details.
This walkthrough shows how to setup a Private Link Service with an AKS cluster and create a Private Endpoint in a separate Vnet. While many tutorials might give you a full ARM template, this is designed as a walkthrough which completely uses the CLI so you can understand what's happening at every step of the process. It focuses on an "uninteresting" workload and uses podinfo as the sample app. This is because it's easy to deploy and customize with a sample Helm chart. This is inspired and leans heavily on the Azure Docs for creating a Private Link Service. Architecture Private Link Endpoint Service Prerequisites Azure CLI jq Assumptions This walkthrough assumes you let Azure create the Vnet when creating the AKS cluster. If you manually created the Vnet, then the general steps are the same, except you must enter the AKS_MC_VNET, AKS_MC_SUBNET env vars manually. Setup Steps First, create a sample AKS cluster and install Podinfo on it. Set these values AKS_NAME= AKS_RG= LOCATION= Create the AKS cluster az aks create -n $AKS_NAME -g $AKS_RG Get the MC Resource Group AKS_MC_RG=$(az aks show -n $AKS_NAME -g $AKS_RG | jq -r '.nodeResourceGroup') echo $AKS_MC_RG Get the Vnet Name AKS_MC_VNET=$(az network vnet list -g $AKS_MC_RG | jq -r '.[0].name') echo $AKS_MC_VNET AKS_MC_SUBNET=$(az network vnet subnet list -g $AKS_MC_RG --vnet-name $AKS_MC_VNET | jq -r '.[0].name') echo $AKS_MC_SUBNET AKS_MC_LB_INTERNAL=kubernetes-internal AKS_MC_LB_INTERNAL_FE_CONFIG=$(az network lb rule list -g $AKS_MC_RG --lb-name=$AKS_MC_LB_INTERNAL | jq -r '.[0].frontendIpConfiguration.id') echo $AKS_MC_LB_INTERNAL_FE_CONFIG Deploy a sample app using an Internal LB helm upgrade --install --wait podinfo-internal-lb \ --set-string service.annotations."service\.beta\.kubernetes\.io\/azure-load-balancer-internal"=true \ --set service.type=LoadBalancer \ --set ui.message=podinfo-internal-lb \ podinfo/podinfo Install Steps - Create the Private Link Service These steps will be done in the MC_ resource group. Disable the private link service network policies az network vnet subnet update \ --name $AKS_MC_SUBNET \ --resource-group $AKS_MC_RG \ --vnet-name $AKS_MC_VNET \ --disable-private-link-service-network-policies true Create the PLS PLS_NAME=aks-pls az network private-link-service create \ --resource-group $AKS_MC_RG \ --name $PLS_NAME \ --vnet-name $AKS_MC_VNET \ --subnet $AKS_MC_SUBNET \ --lb-name $AKS_MC_LB_INTERNAL \ --lb-frontend-ip-configs $AKS_MC_LB_INTERNAL_FE_CONFIG Install Steps - Create the Private Endpoint These steps will be done in our private-endpoint-rg resource group. PE_RG=private-endpoint-rg az group create \ --name $PE_RG \ --location $LOCATION PE_VNET=pe-vnet PE_SUBNET=pe-subnet az network vnet create \ --resource-group $PE_RG \ --name $PE_VNET \ --address-prefixes 10.0.0.0/16 \ --subnet-name $PE_SUBNET \ --subnet-prefixes 10.0.0.0/24 Disable the private link service network policies az network vnet subnet update \ --name $PE_SUBNET \ --resource-group $PE_RG \ --vnet-name $PE_VNET \ --disable-private-endpoint-network-policies true PE_CONN_NAME=pe-conn PE_NAME=pe az network private-endpoint create \ --connection-name $PE_CONN_NAME \ --name $PE_NAME \ --private-connection-resource-id $PLS_ID \ --resource-group $PE_RG \ --subnet $PE_SUBNET \ --manual-request false \ --vnet-name $PE_VNET We need the NIC ID to get the newly created Private IP PE_NIC_ID=$(az network private-endpoint show -g $PE_RG --name $PE_NAME -o json | jq -r '.networkInterfaces[0].id') echo $PE_NIC_ID Get the Private IP from the NIC PE_IP=$(az network nic show --ids $PE_NIC_ID -o json | jq -r '.ipConfigurations[0].privateIpAddress') echo $PE_IP Validation Steps - Create a VM Lastly, validate that this works by creating a VM in the Vnet with the Private Endpoint. VM_NAME=ubuntu az vm create \ --resource-group $PE_RG \ --name ubuntu \ --image UbuntuLTS \ --public-ip-sku Standard \ --vnet-name $PE_VNET \ --subnet $PE_SUBNET \ --admin-username $USER \ --ssh-key-values ~/.ssh/id_rsa.pub VM_PIP=$(az vm list-ip-addresses -g $PE_RG -n $VM_NAME | jq -r '.[0].virtualMachine.network.publicIpAddresses[0].ipAddress') echo $VM_PIP SSH into the host ssh $VM_IP $ curl COPY_THE_VALUE_FROM_PE_IP:9898 The output should look like: $ curl 10.0.0.5:9898 { "hostname": "podinfo-6ff68cbf88-cxcvv", "version": "6.0.3", "revision": "", "color": "#34577c", "logo": "/images/2022/cuddle_clap.gif", "message": "podinfo-internal-lb", "goos": "linux", "goarch": "amd64", "runtime": "go1.16.9", "num_goroutine": "9", "num_cpu": "2" } Multiple PLS/PE To test a specific use case, I wanted to create multiple PLS and PE's. This set of instructions lets you easily loop through and create multiple instances. podinfo requires a high numbered port, eg 9000+ SUFFIX=9000 helm upgrade --install --wait podinfo-$SUFFIX \ --set-string service.annotations."service\.beta\.kubernetes\.io\/azure-load-balancer-internal"=true \ --set service.type=LoadBalancer \ --set service.httpPort=$SUFFIX \ --set service.externalPort=$SUFFIX \ --set ui.message=podinfo-$SUFFIX \ podinfo/podinfo This might be easier to hard-code AKS_MC_LB_INTERNAL_FE_CONFIG=$(az network lb rule list -g $AKS_MC_RG --lb-name=$AKS_MC_LB_INTERNAL -o json | jq -r ".[] | select( .backendPort == $SUFFIX) | .frontendIpConfiguration.id") echo $AKS_MC_LB_INTERNAL_FE_CONFIG PLS_NAME=aks-pls-$SUFFIX PE_CONN_NAME=pe-conn-$SUFFIX PE_NAME=pe-$SUFFIX az network private-link-service create \ --resource-group $AKS_MC_RG \ --name $PLS_NAME \ --vnet-name $AKS_MC_VNET \ --subnet $AKS_MC_SUBNET \ --lb-name $AKS_MC_LB_INTERNAL \ --lb-frontend-ip-configs $AKS_MC_LB_INTERNAL_FE_CONFIG PLS_ID=$(az network private-link-service show \ --name $PLS_NAME \ --resource-group $AKS_MC_RG \ --query id \ --output tsv) echo $PLS_ID az network private-endpoint create \ --connection-name $PE_CONN_NAME \ --name $PE_NAME \ --private-connection-resource-id $PLS_ID \ --resource-group $PE_RG \ --subnet $PE_SUBNET \ --manual-request false \ --vnet-name $PE_VNET PE_NIC_ID=$(az network private-endpoint show -g $PE_RG --name $PE_NAME -o json | jq -r '.networkInterfaces[0].id') echo $PE_NIC_ID PE_IP=$(az network nic show --ids $PE_NIC_ID -o json | jq -r '.ipConfigurations[0].privateIpAddress') echo $PE_IP echo "From your Private Endpoint VM run: curl $PE_IP:$SUFFIX" I created this article to help myself (and hopefully you!) to clearly understand all of the resources and how they interact to create a Private Link Service and Private Endpoint fronting a private service inside an AKS cluster. This has been highly enlightening for me and I hope it has for you too.
This article explains why, when, and how to use self-managed Kubernetes clusters in Azure for testing custom scenarios. Kubernetes has gotten so large and complex that most companies prefer to use the managed service (e.g. AKS, GKE) instead of running it themselves. By using a managed Kubernetes service, this frees up the operations team to focus on their core competency instead of optimizing, backing up and upgrading of Kubernetes. While this reduces the operational burden, you lose the ability to modify the platform. Sometimes these are acceptable tradeoffs, sometimes you need to manage it yourself. Historically, AKS-engine was the OSS tool for creating unmanaged Kubernetes clusters on Azure, but it had some limitations. CAPI/CAPZ is the go-forward solution for creating and operating self-managed clusters declaratively. I highly recommend reading Scott Lowe's article on An introduction to CAPI. It covers a lot of terminology and concepts used here. One of the reasons for using CAPI/CAPZ is as a testing and development tool for Kubernetes on Azure. For example, you might need to build and test the following scenarios: A kernel change to the worker nodes A modification to the K8S config on control plane nodes An installation of a different CNI The use of K8S to manage K8S This diagram represents a high level architecture of a starter CAPI/CAPZ cluster. The rest of this article will explain how to implement the above scenarios utilizing the CAPI quickstart. Because the command arguments will change over time, this article will describe the steps and provide a link to the full details like this: Link to CAPI Quick Start with details: base command to run Create the KIND Cluster Similar to RepRap, CAPI uses a Kubernetes cluster to make more Kubernetes clusters. The easiest way is with Kuberenetes IN Docker (KIND). As the name implies, it's a Kubernetes cluster which runs as a Docker container. This is our starting point for what we call "Bootstrap Cluster". Create Kind Cluster: kind create cluster Initialize cluster for Azure We will use this bootstrap cluster to initialize the "Management Cluster" which contains all of the CRDs and runs the CAPI controllers. This is where we will apply all of our changes to meet our scenarios. Initialize cluster for Azure: clusterctl init --infrastructure azure Generate cluster configuration Now that our management cluster is ready, we want to define what our workload cluster will look like. Thankfully, there are different flavors we can pick from. By using the default, we will get an unmanaged K8S cluster using virtual machines. Generate cluster configuration: clusterctl generate cluster capi-quickstart > capi-quickstart.yaml We now have a file which contains the CRDs which will define our workload cluster. We will modify capi-quickstart.yaml and edit the CRDs to implement each of our scenarios. Full documentation is available for CAPI (baseline) CRDs and CAPZ (Azure specific resources) CRDs. Scenario: Worker node kernel change If we want to modify the worker nodes, we likely want to add a preKubeadmCommands and postKubeadmCommands directive in the KubeadmConfigTemplate. preKubeadmCommands allows a list of commands to run on the worker node BEFORE joining the cluster. postKubeadmCommands allows a list of commands to run on the worker node AFTER joining the cluster. apiVersion: bootstrap.cluster.x-k8s.io/v1alpha4 kind: KubeadmConfigTemplate metadata: name: capi-quickstart-md-0 namespace: default spec: template: spec: preKubeadmCommands: wget -P /tmp https://kernel.ubuntu.com/.deb dpkg -i /tmp/.deb postKubeadmCommands: reboot After you've made these changes, you can proceed to the rest of the steps by applying the resources to your management cluster which will then create your workload cluster and deploy the CNI. Scenario: Modify Kubernetes components If we want to modify the control plane, we can make changes to the KubeadmControlPlane. This allows us to leverage the kubeadm API to customize various components. For example, to enable a Feature Gate on the kube-apiserver: apiVersion: controlplane.cluster.x-k8s.io/v1alpha4 kind: KubeadmControlPlane metadata: name: capi-quickstart-control-plane namespace: default spec: kubeadmConfigSpec: clusterConfiguration: apiServer: extraArgs: feature-gates: MyFeatureGate=true The above example omits some fields for brevity. Make sure that you keep any existing args and configurations that you are not modifying in-place. After you've made these changes, you can proceed to the rest of the steps by applying the resources to your management cluster which will then create your workload cluster and deploy the CNI. Apply the Workload Cluster Now that we have defined what our cluster should look like, apply the resources to the management cluster. The CAPZ operator will detect the updated resources and talk to Azure Resource Manager. Apply the workload cluster kubectl apply -f capi-quickstart.yaml Monitor the Cluster Creation After you've made the changes to the capi-quickstart.yaml resources and applied them, you're ready to watch the cluster come up. Watch the cluster creation: kubectl get cluster clusterctl describe cluster capi-quickstart kubectl get kubeadmcontrolplane - Verify the Control Plane is up Now that the workload cluster is up and running, it's time to start using it! Get the Kubeconfig for the Workload Cluster Now that we're dealing with two clusters (management cluster in Docker and workload cluster in Azure), we now have two kubeconfig files. For ease, we will save it to the local directory. Get the Kubeconfig for the workload cluster clusterctl get kubeconfig capi-quickstart > capi-quickstart.kubeconfig Install the CNI By default, the workload cluster will not have a CNI and one must be installed. Deploy the CNI kubectl --kubeconfig=./capi-quickstart.kubeconfig apply -f https://...calico.yaml Scenario: Install a different CNI If you want to use flannel as your CNI, then you can apply the resources to your management cluster which will then create your workload cluster. However, instead of Deploying the CNI, you can follow the steps in the Install Flannel walkthrough. Cleanup When you're done, you can cleanup both the workload and management cluster easily. Delete the workload cluster kubectl delete cluster capi-quickstart If you want to create the workload cluster again, you can do so by re-applying capi-quickstart.yaml Delete the management cluster kind delete cluster If you want to create the management cluster again, you must start from scratch. If you delete the management cluster without deleting the workload cluster, then the workload cluster and Azure resources will remain. Summary Similar to how Kubernetes allows you to orchestrate containers using a declarative syntax, CAPI/CAPZ allows you to do the same, but for Kubernetes clusters in Azure. This article covered example scenarios for when to use CAPI/CAPZ as well as a walkthrough on how to implement them. I'm especially excited for the future of CAPI/CAPZ and how it can integrate with other Cloud Native methodologies like GitOps to declaratively manage clusters. P.S. I am extremely grateful to Cecile Robert Michon's (Twitter & Github) technical guidance for this article. Without her support, I wouldn't have gotten this far and definitely would have missed a few key scenarios. Thanks Cecile!

DIY LED lanyard build using WS2812B strips and Raspberry Pi, with parts, power lessons, and assembly tips for wearable conference projects.
Azure Functions (one of the many Serverless Platforms inside Azure) allows you to use Python as your runtime environment. This is great; however, it requires Python 3.6, which is a problem for my development on a Mac (which uses Python 3.7). Downgrading/dual installation has the potential for many perils, so I wanted an isolated runtime development environment which wouldn't interfere with my current setup. Here's my requirements: Run Azure Functions locally (e.g. "func host start") Publish Azure Functions locally (e.g. "func azure functionapp publish") Use my existing Azure CLI session (i.e. don't have to login each time) Won't confuse my existing Python 3.7 env. Docker to the rescue! I'll spare you the details of the iterative process of creating the Dockerfile, but after a some iterations, I knew I was on the right track. You can copy/create my code here: https://gist.github.com/lastcoolnameleft/05b6b09735fb435b2cb4469f6cf30ac6 In short, it creates a Docker image and runs it with: Ubuntu 18.04 Python 3.6 Azure CLI Azure Function Core Tools Forwards port 7071 from inside the container to my localhost (used for local function testing) Mounts my home dir to /root to maintain my Azure CLI session. (e.g. No login!) This will definitely save me time each time I want to setup a new Function (or other) environment and I hope it helps save time for you too. Make my func the p-func!

The internet's a weird place. We already knew that, yet it keeps finding new ways to amaze me. Someone thought it would be a novel idea to incorporate…
As much as Cloud Providers tout their availability and uptime, disasters happen. It's inevitable. And it's usually up to you to be prepared. There are services that can help; however, they're not always "Kubernetes aware". Thankfully, the great folks at Heptio open-sourced Ark, a Disaster Recovery tool which works for all the major cloud providers. I got hands-on with Ark and followed their Azure steps. It was a good start, but didn't highlight how an actual failover and recovery would look to the operator. I took their steps and created a step-by-step guide to perform a full migration. Ark support Azure native resources, namely Managed Disk + Snapshots. You can review those steps here: https://github.com/heptio/ark/blob/master/docs/azure-config.md Another option would be to use Restic, which performs backups to a local file system. Later, I'll detail the steps on how to use Restic with Azure. If you're looking for Best Practices on supporting Business Continuity and Disaster Recovery for AKS/K8S clusters in Azure, you're in luck! I wrote a Microsoft article covering this use case, which can be found here: https://docs.microsoft.com/en-us/azure/aks/operator-best-practices-multi-region
I created this article with the intent of explaining the migration journey from deploying a legacy application with manual steps to an automated Kubernetes deployment with proper DevOps practices. Its intent is not to help you understand Kubernetes deeper (there’s an abundance of materials out there already). As a Cloud Solution Architect for Microsoft, every week I work with our partners to assist them towards containerization and Kubernetes. I’ll use AKS and discuss it’s strengths and weaknesses without holding punches. Disclaimer: Given I work for Microsoft, I am self-aware of my bias. So in this article, I will make an effort to be more critical of Azure to balance that out. Beginning With the End in Mind, I created the following outline: Intent Duckiehunt is secure, monitored and deployable with the least amount of manual effort, cost and code-change. Purpose I wrote Duckiehunt in 2007 as a LAMP website. It embodies many of the customer requirements I see: Old code, using legacy tooling Want a reliable, resilient infrastructure Want to automate deployment Don't want to re-write Migration should involve minimal/no code change Need to update to modern standards (e.g. HTTPS, MySQL encryption, private DB instance with backups) Outcomes CI/CD (Code Check-in triggers automated tests and pushes to Production) Monitoring cluster + app (visualization + alerts if down) HTTPS enabled for duckiehunt.com (CA Cert + forced redirection to https) Running on Kubernetes (AKS) Managed MySQL Milestones: (in reverse order of accomplishment) Production DNS migrated Azure Monitor + Container Monitoring Solution + LogAnalytics Distinct Dev + Prod environments VSTS + Github integration Securely expose UI + API Integrated MySQL instance Installed on AKS Test in Minikube Migrate App to Container From here on, I’ll explain my journey as steps fulfilling the milestones I created. I’ll list my estimated time, as along with my actual time to compare. The times below are not “Time to get X workingâ€, but “Time to get X working correctly and automate as if I had to support this in production†(which I do). As a result, they’re much higher than a simple success case. Migrate app to Container Estimated Time: 4 hours. Actual Time: 10 hours I wrote this in 2007 using a PHP version that is no longer supported (5.3) and a framework (CodeIgniter) that is not as active. I didn’t want to re-write it yet. Thankfully, 5.6 is mostly backwards compatible and I was able to find a container using that. I would have been done in ~4 hours; however, I lost an embarrassing amount of hours banging my head against the wall when I automated the docker build. (I would always get 404) I learned this was because Linux’s file system is case-sensitive and OSX’s is not, and the PHP framework I chose in 2007 expects the first character of some files to start with a capital letter. grumble* *grumble Test in Minikube Estimated time: 12 hours. Actual Time: 10 hours Now that I got my PHP app running in a container, it was time to get it running inside Kubernetes. To do this, I needed to deploy, integrate and test the following: Pod, Service, Secrets, Configuration, MySQL and environment variables. This is a pretty iterative approach of "This, this…nope…how about this?...Nope...This?...ah ha!...Ok, now this...Nope." This is where Draft comes in. It’s a Kubernetes tool specifically designed for this use case, and I think I’ve started to develop romantic feelings for this tool because of how much time and headache it saved me while being dead simple to use. Install in AKS Estimated time: 8 hours. Actual time: 2 hours Creating a new AKS cluster takes about 10 minutes and is instantly ready to use. Because I had done the work on testing it Minikube the hard-word was already done, but I expected some additional hiccups. Again, this is where my love and adoration of Draft started to shine. I was almost done in 30 minutes, but I took some shortcuts with Minikube that came back to bite me. Integrated MySQL instance Estimated time: 2 hours. Actual time: 3 hours Azure now offers MySQL as a Service (aka Azure Database for MySQL) and I chose to use that. I could have run MySQL in a container in the cluster; however, I would have had to manage my own SLA, backups, scaling, etc. Given my intent of this project is to have the least amount of work and cost, and the cost is still within my MSDN budget, I chose to splurge. I spent an hour experimenting with Open Service Broker for Azure (a way of managing external dependencies, like MySQL, native to K8S). I really like the idea, but I wanted one instance for both Dev + Prod and needed a high control over how my app read in database parameters (since it was written in 2007). If I was doing more deployments than one, OSBA would be the right fit, but not this time. Steps taken: Create the Azure Database for MySQL Instance Created the dev/prod accounts Migrated the data (mysqldump) White-listed the source IPs (To MySQL, the cluster traffic looks as if it's coming from the Ingress IP address) Injected the connection string to my application (Using K8S Secrets) Then I was off to the races. OSBA would have automated all of that for me, but I'll save that for a proverbial rainy day. Securely expose UI + API Estimated time: 4 hours. Actual time: 20 hours This was the most frustrating part of the entire journey. I decided to use Nginx Ingress Controller with Cert-manager (for SSL). There’s lots of old documentation that conflicts with recommended practices, which led to lots of confusion and frustration. I got so frustrated I purposely deleted the entire cluster and started from scratch. Lessons’ learned: nginx-ingress is pretty straight-forward and stable. Cert-manager is complicated and I had to restart it a lot. I really miss kube-lego (same functionality, but deprecated. Kube-lego was simple and reliable) Put your nginx-ingress + cert-manager in kube-system, not in the same namespace as your app You might have to restart cert manager pods when you modify services. I had issues where cert-manager was not registering my changes. cert-manager might take ~30 minutes to re-calibrate itself and successfully pull the cert it’s been failing on for the last 6 hours cert-manager creates secrets when it tries to negotiate, so be mindful of extra resources left around, even if you delete the helm chart cert-manager injects its own ingress into your service for verifying you own the domain. If you don’t have your service/ingress working properly, cert-manager will not work If you’re doing DNS changes, cert-manager will take a long time to “uncache†the result. Rebooting kibe-dns doesn’t help. There’s no documentation for best-practices for setting up 2 different domains with cert-manager (e.g. dev.duckiehunt.com; www.duckiehunt.com) AKS's HTTP application routing is a neat idea, but you cannot use custom domains. So you're forced to use its *.aksapps.io domain for your services. Great idea, but not useful in real-world scenarios To summarize, I was finally able to get development and production running in two different namespaces with one ingress controller and one cert-manager. Should have been simple, but death-by-1000-papercuts ensued with managing certs for each of them. Now I’m wiser, but the journey was long and frustrating. That might involve a blog post of its own. VSTS + Github integration Estimated time: 4 hours. Actual time: 2 hours VSTS makes CI/CD easy. Real easy. Almost too easy. I lost some time (and ~8 failed builds) because the VSTS UX isn’t intuitive to me and documentation is sparse. But now that it’s working, I have a fully automated Github commit -> Production release pipeline which completes within 5 minutes. This will save me a tremendous amount of time in the future. This is what I’m most excited about. Azure Monitor + Container Monitoring Solution + LogAnalytics *Estimated time: 3 hour. Actual time: None. * This was the surprising part. All of this work was already done for me by setting up the AKS cluster and integrated into the portal. I was impressed that this was glued together without any additional effort needed. That said, here’s some “gotchasâ€: The LogAnalytics SLA is 6 hours. My testing showed that new logs showed up within 5 minutes, but after a cluster is newly created, initial logs would take 30 minutes to appear. The LogAnalytics UX isn’t intuitive, but the query language is extremely powerful and each of the pods logs were available by clicking through the dashboard. Monitoring and Logging are two pillars of the solution; however, Alerting is missing from the documentation. That integration is forthcoming, and will likely involve another blog entry. The “Health†tile is useful for getting an overview of your cluster; however, the “Metrics†tile seems pretty limited. Both are still in Preview, and I expect to see additional improvements coming soon. Production DNS migrated Estimated time: 1 hour. Actual time: 1 hour Since I did the heavy lifting in the “Securely expose UI + API†section, this was as easy as flipping a light switch and updating the DNS record in my registrar (dreamhost.com). No real magic here. Summary This has been a wonderful learning experience for me, because I was not just trying to showcase AKS/K8S and its potential, but also using it as it is intended to be used, thus getting my hands dirtier than normal. Most of the underestimated time was spent on a few issues that “rat-holed†me due to technical misunderstandings and gaps in my knowledge. I’ve filled in many of those gaps now and hope that it saves you some time too. If this has been valuable for you, please let me know by commenting below. And if you’re interesting in getting a DuckieHunt duck, let me know as I’d love to see more take flight! P.S. The source code for this project is also available here.
WARNING: SSH'ing into an agent node is an anti-pattern and should be avoided. However, we don't live in an ideal world, and sometimes we have to do the needful. Overview This walkthrough creates an SSH Server running as a Pod in your Kubernetes cluster and uses it as a jumpbox to the agent nodes. It is designed for users managing a Kubernetes cluster who cannot readily SSH to into their agent nodes (e.g. AKS) does not publicly expose the agent nodes for security considerations). This is one of the steps in the Kubernetes Workshop I have built when working with our partners. NOTE It has been tested in AKS cluster; however, it should also work in other cloud providers. You can follow the steps on the SSH to AKS Cluster Nodes walkthrough; however, that requires you to upload your Private SSH key which I would rather avoid. Assumptions The SSH Public key has been installed for your user on the Agent host You have jq installed Not vital, but makes the last step easier to understand. Install an SSH Server If you're paranoid, you can generate your own SSH server container; however, (https://github.com/corbinu/ssh-server) has some pretty good security defaults and is available on Docker Hub. kubectl run ssh-server --image=corbinu/ssh-server --port=22 --restart=Never Setup port forward Instead of exposing a service with an IP+Port, we'll take the easy way and use kubectl to port-forward to your localhost. NOTE: Run this in a separate window since it will need to be running for as long as you want the SSH connection kubectl port-forward ssh-server 2222:22 Inject your Public SSH key Since we're using the ssh-server as a jumphost, we need to inject our SSH key into the SSH Server. Using root for simplicity's sake, but I recommend a more secure approach going forward. (TODO: Change this to use a non-privileged user.) cat ~/.ssh/id_rsa.pub | kubectl exec -i ssh-server -- /bin/bash -c "cat >> /root/.ssh/authorized_keys" SSH to the proxied port Using the SSH Server as a jumphost (via port-forward proxy), ssh into the IP address of the desired host. `# Get the list of Host + IP's kubectl get nodes -o json | jq '.items[].status.addresses[].address' $USER = Username on the agent host $IP = IP of the agent host ssh -J root@127.0.0.1:2222 $USER@$IP` NOTE: If you get "WARNING: REMOTE HOST IDENTIFICATION HAS CHANGED!" You might need to add -o StrictHostKeyChecking=no to the SSH command if you bounce across clusters. This is because SSH believes that the identity of the host has changed and you need to either remove that entry from your ~/.ssh/known_hosts or tell it to ignore the host identity. Cleanup kubectl delete pod ssh-server Kill the kubectl port-forward command
Emerging civilizations naturally gravitate towards beds of water. Growing up in lower Louisiana, the Mighty Mississippi was where my ancestry settled. It…
I was recently invited to participate in the Microsoft Partner blog where I shared my love of containers. I'm especially passionate about container technology because of how much it makes the developer's life easier. Unfortunately, it's one of those things that must be experienced to truly understand. I tried to boil my thoughts town to just a few paragraphs here. Check it out and let me know what you think! https://blogs.technet.microsoft.com/msuspartner/2017/11/13/how-i-learned-to-stop-worrying-and-love-the-containers/
Azure App Service for Linux is a pretty neat offering from Azure. You get all of the DevOps features you want (A/B Testing, Hosted Application, Tiered Support, Button-click scaling, lots of templates and more!) without the headache of managing VM's. 9 years ago, I wrote a quacky little website called "Duckiehunt". Unfortunately, I didn't pay the tech debt and things kept breaking until it was abandoned. I'm now using Duckiehunt as a learning ground for Azure's services and alternatives. Azure App Service for Linux was the perfect fit. However, back in 2008 SSL wasn't as ubiquitous. Now, it's a badge of shame to NOT have it. Azure does offer an App Service Certificate, but I'd like to find a cheaper/more open solution. Enter Let'sEncrypt from Mozilla and the EFF. If you don't know, EFF are the unsung heroes of the internet. They fight tirelessly to support your freedom and rights on the internet. Mozilla and EFF offer Let'sEncrypt as a free way to encrypt websites via CertBot. Now I'll dig into the technical details behind encrypting an App Service for Linux with Let'sEncrypt. Step #1: Get CertBot Because I'm on OSX, I was able to run: brew install certbot. For the full range of options, CertBot's webpage has what you need. Step #2: Create Cert locally Before CertBot can create the certificate for you, it must first validate you own the domain. It will prompt you for a few questions, and then ask you to create a file on the webhost and add content to that file for validation. Thankfully, Azure App Service for Linux provides a terminal access to your container so you can make these modifications yourself. ➜ sudo certbot certonly -d duckiehunt.com --manual ... Create a file containing just this data: %RANDOM STRING 1% And make it available on your web server at this URL: http://duckiehunt.com/.well-known/acme-challenge/%RANDOM STRING 2% ------------------------------------------------------------------------------- Press Enter to Continue Step #3: Add the validation file to you website I then went to the Kudu instance of my App Service and ran: ➜ mkdir /var/www/html/.well-known/acme-challenge/ ➜ echo "%RANDOM STRING 2%" > %RANDOM STRING 1% At this point, the validation is in place and it's time to continue with Chatbot by pressing "Enter". Waiting for verification... Cleaning up challenges IMPORTANT NOTES: - Congratulations! Your certificate and chain have been saved at: /etc/letsencrypt/live/duckiehunt.com/fullchain.pem Your key file has been saved at: /etc/letsencrypt/live/duckiehunt.com/privkey.pem Your cert will expire on 2017-11-12. To obtain a new or tweaked version of this certificate in the future, simply run certbot again. To non-interactively renew all of your certificates, run "certbot renew" - If you like Certbot, please consider supporting our work by: Donating to ISRG / Let's Encrypt: https://letsencrypt.org/donate Donating to EFF: https://eff.org/donate-le Huzzah! I've now got a certificate. Time to upload. Step #4: Upload the certificate to Azure Azure has a pretty descriptive set of steps for associating a certificate to your App Service, which I was able to follow. Openssl will ask for a Password which you need to keep as you upload the cert to Azure. ➜ cd /etc/letsencrypt/live/duckiehunt.com ➜ openssl pkcs12 -export -out myserver.pfx -inkey privkey.pem -in fullchain.pem Enter Export Password: Verifying - Enter Export Password: ➜ cp myserver.pfx ~/Desktop Step #5: Bind the certificate to your App Service From here on you're ready to Bind your SSL Certificate to your App Service. I'll let Microsoft's documentation lead the way from here. https://docs.microsoft.com/en-us/azure/app-service-web/app-service-web-tutorial-custom-ssl#bind-your-ssl-certificate Step #6: Bask in doing your part to secure the internet. In summary, the process was pretty painless. I used Let'sEncrypt to create a new Certificate for my App Service for Linux by creating a file that Let'sEncrypt could use to validate I owned the site. I then encrypted that certificate to upload to Azure. Once it was uploaded, I bound that certificate to my domain and voila! A more secure Duckiehunt One bummer is that the certificate is intended to expire in 3 months instead of the industry standard of 12 months. The renewal process looks pretty easy, but that's a different blog post. --Tommy feels that he's done his part in making the world a bit safer.
Like most children of the 80's, I loved playing with LEGO. By mixing and matching bricks, you could physically manifest your imagination. My first LEGO set was the Blacktron - Renegade. Blacktron Renegade By following the instructions, I was able to explore space and move strange and dangerous cargo from distant planets. By moving the wings around, I was able to make the Batwing and fly around Gotham. (Well before anyone else realized that potential.) This was an immensely rewarding experience that I've carried with me through my professional career. Naturally, the toys of the child lead us to adulthood. I knew I wanted to spend my life building. Creating. Spawning new ideas. I wanted to physically manifest my ideas into structures that others would see, admire and even work/play/live in. When I learned that you could get a job doing this, I was elated. I knew this was exactly what I wanted to do. My mission in life was set. One fateful day, when I was sharing my new life mission with my Godmother she informed me: "To be an architect you have to know how to draw." Anyone who's seen me sign a check, write on a whiteboard, or even attempt to draw a square knows artistry genes were not bestowed upon me. I was crushed. My life's mission was aborted and I was unsure what to do with myself. My first drawing of the Falgout Family (I ran out of time for arms) To quote my wife: "Those are people? I thought those were windows..." I drew this I drew this. Not sure what my obsession with blue people was. That drawing is nightmare fuel for me. In High School, when Career Day came I didn't care about any session other than the local architect. As torturous as it was, I still wanted to know what it was like. All I remember was "hard work...something something...dedication". Fast forward to the last 12 months. I made an exciting and brave leap to join Microsoft, and am now a "Cloud Solution Architect". I'm an Architect. I'm a real, bonafide Architect. (I'm literally crying as I write this as I'm so overwhelmed with a sense of accomplishment.) My bricks aren't 8x8x9.6 mm, they're CPU Cores. I no longer have one toychest, I have 36 datacenter regions, spanned across the world. Thankfully, I'm not planning to give up on those plastic pieces of creativity, as I've currently got a Star Destroyer hanging from the ceiling of my man cave. And even more sets left to complete. LEGO Star Destroyer hanging from the ceiling. If I could go back and comfort my younger self during that heartbreaking moment, I'm sure I would have told him: "hard work...something something...dedication".
//build is a developer-centric conference Microsoft hosts every year. Since I never expected to work for Microsoft, I wasn't even aware of //build. So,…
TL;DR: Size matters. After Oracle's surprise announcement of their containerization of Oracle DB, Oracle WebLogic and a few of their other core technologies, I decided to test it out for myself. (Speaking authentically, I'm leery of their commitment; however, I recognize that I work on Open Source at Microsoft, so who am I to judge?) My end-goal is to get Oracle DB 12.2 running in a container on Kubernetes inside Azure Container Service. This is Part 1 of my walkthrough from 0 to operational. Build and Verify the Container Unlike most Docker projects, Oracle does not have a public image on Docker Hub. To get started, you'll need to: Clone their Github repo Download the Oracle DB instance Run their buildDockerImage.sh from the Github Repo Start the container Clone the github repo `git clone git@github.com:oracle/docker-images.git ... Receiving objects: 100% (5643/5643), 425.77 MiB | 5.41 MiB/s, done. ` Wait...what?! 425MB?! After some sleuthing, it appears they once included the OracleLinux binaries in the git repo but have not purged them. Poor Github. I have a tremendous amount of appreciation for their architects and support engineers. Below is the SHA1 of the blob, the # of bytes of each file and the path. `git clone git@github.com:oracle/docker-images.git Cloning into 'docker-images'... remote: Counting objects: 5643, done. remote: Compressing objects: 100% (35/35), done. remote: Total 5643 (delta 12), reused 0 (delta 0), pack-reused 5607 Receiving objects: 100% (5643/5643), 425.77 MiB | 5.41 MiB/s, done. Resolving deltas: 100% (3164/3164), done. git:(master) git rev-list --objects --all \ | git cat-file --batch-check='%(objecttype) %(objectname) %(objectsize) %(rest)' \ | awk '/^blob/ {print substr($0,6)}' \ | sort --numeric-sort --key=2 | tail -7 35eda80405d711ae557905633d9f9b8d756afb94 42358832 OracleLinux/7.0/oraclelinux-7.0.tar.xz e359def3dde981199ea692bbb26c24bd37e6fd68 42765288 OracleLinux/7.1/oraclelinux-7.1.tar.xz 0956d25bcb27f804cfc37f2a519a5cfb35af0955 43951872 OracleLinux/6.8/oraclelinux-6.8-rootfs.tar.xz 6de0b5011f509e53623ab0170fbc72e8bb53b501 43953520 OracleLinux/6.9/oraclelinux-6.9-rootfs.tar.xz b05b9f4971b6d28330545fadc234eb423815dd59 47275816 OracleLinux/7.2/oraclelinux-7.2-rootfs.tar.xz 9b07a976e61ed2cf3a02173bf8c2d829977f2406 49130232 OracleLinux/7.3/oraclelinux-7.3-rootfs.tar.xz 3b7610a3df4892e9cf4f5d01eb3d55bcd3f2ad54 50369896 OracleLinux/6.7/oraclelinux-6.7-rootfs.tar.xz ` Moving right along... Download the Oracle DB instance from their website Since Oracle does not allow anyone else to distribute their software, you must go to their site, register (Larry Ellison now has my email), and download. Unfortunately, the login process does not allow me to "wget" the file and put on a remote machine, so I must download locally via browser. I chose "Oracle Database 12c Release 2" `-rw-r--r--@ 1 thfalgou staff 3.2G Apr 27 10:07 linuxx64_12201_database.zip ` Another 3.2GB. I now have an alternate version of Sir Mix A Lot's infamous song going in my head: I LIKE BIG BINARIES AND I CANNOT LIE... Moving right along... Run their buildDockerImage.sh from the Github Repo The documentation isn't explicit about where to store the downloaded image. (in my case the 'OracleDatabase/dockerfiles/12.2.0.1' directory) Now the moment of truth. From the "OracleDatabase/dockerfiles" directory, run buildDockerImage.sh `dockerfiles git:(master) time ./buildDockerImage.sh -v 12.2.0.1 -s ... Building image 'oracle/database:12.2.0.1-se2' ... Sending build context to Docker daemon 3.454 GB^M^M Step 1/16 : FROM oraclelinux:7-slim ---> 442ebf722584 ... Pages and pages of output. So much text that my iTerm buffer no longer had the initial command. ... Oracle Database Docker Image for 'se2' version 12.2.0.1 is ready to be extended: --> oracle/database:12.2.0.1-se2 Build completed in 658 seconds. ./buildDockerImage.sh -v 12.2.0.1 -s 3.68s user 8.15s system 1% cpu 10:57.49 total ` 10 Minutes later, the container is finally built. 10 minutes. 10! Perhaps I'm being overly dramatic; however, the Docker Ecosystem has lots of high expectations and one of those is rapid development and deployment through small, composable artifacts. Granted, building and deploying a new version of database is not a common occurrence; however, the process it not conducive to DevOps. That said, this is their first foray into this, so I'm still excited to see the change. `dockerfiles git:(master) docker images oracle/database 12.2.0.1-se2 f788cd5b4b9d 4 minutes ago 14.8 GB oraclelinux 7-slim 442ebf722584 6 days ago 114 MB fedora latest 15895ef0b3b2 7 days ago 231 MB microsoft/mssql-server-linux latest 7b1c26822d97 7 days ago 1.35 GB nginx latest 5766334bdaa0 3 weeks ago 183 MB ubuntu latest 0ef2e08ed3fa 8 weeks ago 130 MB ... ` 14GB? I take that back. Start the container Let's get the party started... `dockerfiles git:(master) docker run --name oracledb -p 1521:1521 -p 5500:5500 oracle/database:12.2.0.1-se2 ORACLE PASSWORD FOR SYS, SYSTEM AND PDBADMIN: LSNRCTL for Linux: Version 12.2.0.1.0 - Production on 28-APR-2017 03:21:48 Copyright (c) 1991, 2016, Oracle. All rights reserved. Starting /opt/oracle/product/12.2.0.1/dbhome_1/bin/tnslsnr: please wait... TNSLSNR for Linux: Version 12.2.0.1.0 - Production System parameter file is /opt/oracle/product/12.2.0.1/dbhome_1/network/admin/listener.ora Log messages written to /opt/oracle/diag/tnslsnr/91c68ac2b2bf/listener/alert/log.xml Listening on: (DESCRIPTION=(ADDRESS=(PROTOCOL=ipc)(KEY=EXTPROC1))) Listening on: (DESCRIPTION=(ADDRESS=(PROTOCOL=tcp)(HOST=0.0.0.0)(PORT=1521))) ... Copying database files 1% complete ... ` Huzzah! After about 9 minutes, it's finally started! Let's test it! `~ docker exec -ti oracledb sqlplus pdbadmin@ORCLPDB1 SQL*Plus: Release 12.2.0.1.0 Production on Fri Apr 28 03:58:10 2017 Copyright (c) 1982, 2016, Oracle. All rights reserved. Enter password: Connected to: Oracle Database 12c Standard Edition Release 12.2.0.1.0 - 64bit Production SQL> ` We're in!!! It worked! It is at this point that I realize I've already gone through 2 drams of Aberlour and I should probably stop for the night. Provided there is enough interest (and whiskey), I'll write-up Step 2 of getting this running on Kubernetes in ACS. As for now, I should stop while the world is only mildly spinning. NOTE 1: If the database auto-generates a password with a "/" in it, I've found it doesn't work. You can change that by running: docker exec ./setPassword.sh NOTE 2: If you run this multiple times, make sure to run "docker system prune" as it fills up your disk fast. On my 3rd try, I hit the following error, even with lots of space on my disk. ` The location specified for 'Fast Recovery Area Location' has insufficient free space. CAUSE: Only (9,793MB) free space is available on the location (/opt/oracle/oradata/fast_recovery_area/ORCLCDB/). ACTION: Choose a 'Fast Recovery Area Location' that has enough space (minimum of (12,780MB)) or free up space on the specified location. ` NOTE 3: It looks like everyone uses Docker now...
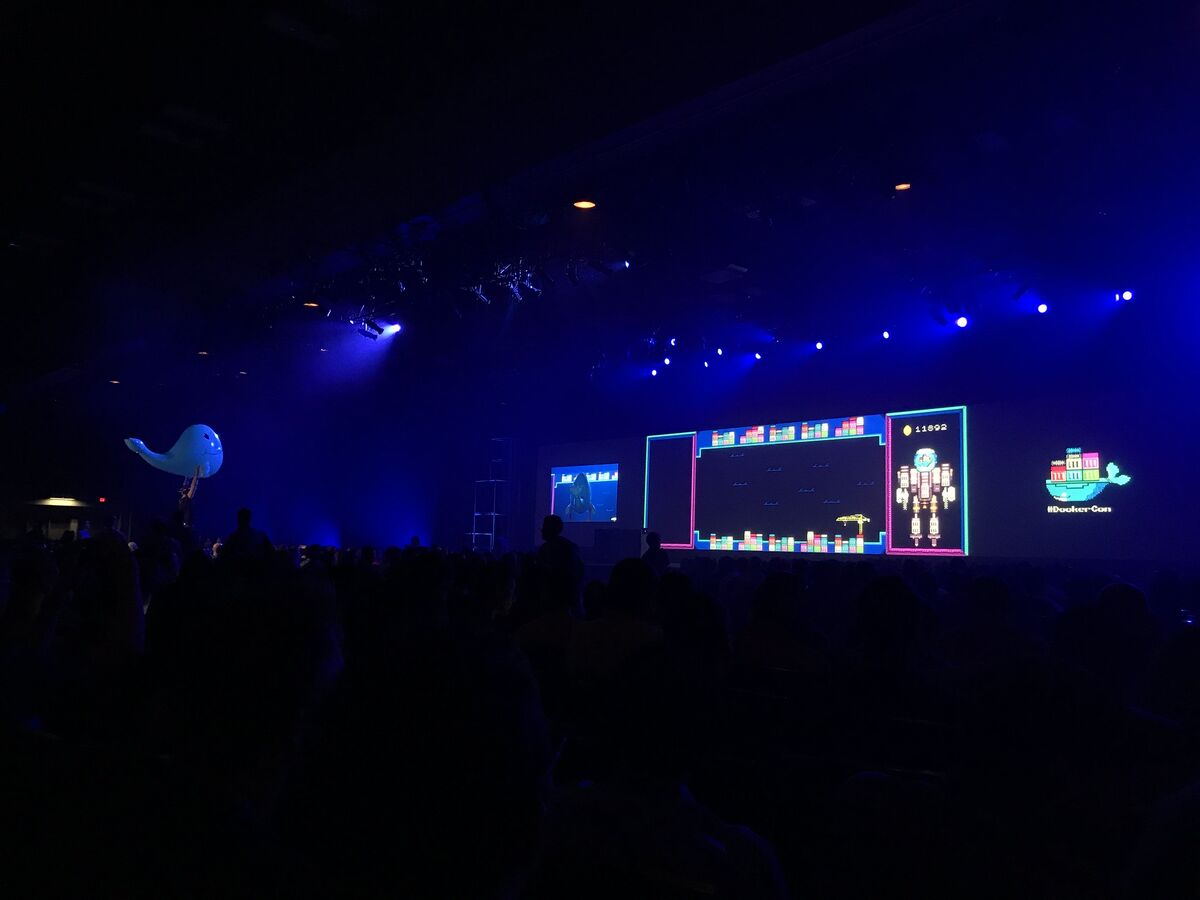
After hearing about it for years, I was fortunate enough to attend DockerCon this time around. Since joining Microsoft as a Open Source Technical…
Laziness, Impatience, Hubris The great Larry Wall claims that these are the three great virtues of a great programmer. And I whole heartedly agree. However, If I were to propose three virtues, they’d be: Inquisitiveness, Acceptance, and Stubbornness. My name is Tommy Falgout, I’m a new employee at Microsoft and I have no idea what I’m doing. I don’t know .NET. Or Azure. I don’t own a Windows Phone. Heck, the last Windows OS I “owned†was XP. What I do have is ~20 years of experience in *nix and Open Source software development. I helped develop the original SMS implementation for GSM, back when phones were only meant for voice. I wrote telecom automation systems in Perl, PHP and MySQL 3.x. I then worked at Yahoo for 9 years where I expanded my brain to build their live events engine to broadcast Obama’s Inauguration, the Royal Wedding and the NFL games (Yahoo used to own NFL streaming rights in the 2000’s) I migrated to Yahoo’s Infrastructure database which was the duct tape keeping everything together and integrated. As a Technical Evangelist, I’m building upon all that experience as a foundation for this new opportunity. To take Azure to the next level. The thing is...I don’t know how to Azure yet. But that’s the point of this blog. To detail my findings and explore the union of Open Source and Azure. This will be a dumping ground and lesson’s learned. I’m a big fan of transparency and learning from other people’s mistakes. My hope is that you can learn from mine. Now to go learn how not to mangle my ARM.
A long, long time ago, LEGO announced their new Collectors Star Destroyer. It was their largest set at the time and I being a long time LEGO maniac, I had to have it. It took many weeks to build, and has been one of my prize possessions which I've flaunted even more than my hot tub. Friends, relationships and other toys have come and gone, but ol'Desty has always been around. Now that I have a wife and kid, space has become constrained, and I've had to become creative in my toy storage. After mulling it around, I realized the best for Ol'Desty was to prominently display her, hanging from the ceiling. Unfortunately, after some researching the only useful bit of information I found was "use fishing wire". I could do better than that. To all my friends who have gotten this far, you can stop reading as the rest will bore you to tiny little brick pieces. To all of the LEGO enthusiasts, on with the gory details! One of the most fascinating parts of trying to hang the LEGO Star Destroyer (LSD) was taking it apart and seeing how 9 years of being on display has affected the structure. If you've built an LSD before, you know that the fuselage is made of four attached triangles and most of the weight settles on the last two-thirds of the structure. You also probably also know that it's an extremely fragile set, held together by magnets. Great idea, but for me, the bottom panels kept falling off all too often. In the pictures, you can see how the center beams have warped over time, bowing up to 4 3/4" from the ground (between the two stands) and sagging to 4" from the ground (at the tip). On my first attempt, I tried to cradle the LSD by wrapping fishing wire around the entire structure, but that caused it to pinch the panels some places and bow out in others. After a few other experiments with the LSD over a generous glass of whiskey and coke, I found my solution. I removed all 4 pieces of panelling and tied one long piece of fishing wire into strategic weight points on the triangle frame, using the peg holes of the middle long bricks to wrap the fishing wire around. I then re-attached the panels and fed the fishing wire between the horizontal center crevice. This approach caused the least amount of structural and functional disruption and allowed it to balance right on it's widthwise center of gravity. I played around with different locations along the frame and finally found a proper equilibrium (see pics). When hanging, my intent was to tilt the LSD slightly forward so that as you enter the room, a clear view of all of the beautiful deals LEGO put into the model are visible. Along with some more adjustments to the weight distribution, I was able to get the angle I wanted. Google Sketchup was a great way to plan out exactly where to drill for the ceiling hooks. It also allows me to make some planned adjustments for upcoming LEGO Goodness It required two people to hoist the LSD up, adjust the tension on the wires and tie off the ends. Once it was all settled and angled properly, the rear wires were significantly tighter than the front, but I believe that this is unavoidable due to the LSD's weight distribution. For the rest of the evening, I just sat there, basking at it's beauty and glowing as it was inspiring to see it hovering ever so menacingly there, and proud of my accomplishment and DIY prowess. Materials: Fishing Wire (Sporting goods store) 3 ceiling plant hooks Whiskey, or libation of choice if so desired. (For focusing your LEGO and Engineering Chi) Electric Drill (for pre-drilling the holes in the ceiling) patience Pics: Example of LSD bowing after 9 years Rear support with fishing wire Mid support with fishing wire Front Support Supports w/o bottom panel Google Sketchup

iPody Dude. Originally uploaded by SnoopyKiss. BIG UPS! to Ruby for accessorizing one of my favorite toys. 9 Guests last weekend, half of which I never…
After taking enough trips for dancing/swing related events, I decided to do something completely different: Accept an invitation to go to Baltimore/Wash. DC to see a wedding of someone I had never met before, a friend of an x-girlfriend. And get some dancing in, if I'm so inclined. As you might know the x-gf in reference is Melissa, the only girlfriend who matched the "area code" rule Lee and I created. (My mobile's 214, so close enough.) We parted on good terms and have kept in touch. I had always seen pictures of the beautiful spread out houses of New England and was delighted to see that unlike my neighborhood, you could walk out your front door for more than 10 straight steps and not be on the road. These people had yards! I mean REAL yards. Ones with more than 50 blades of grass. And hills! And REAL houses. Not ones that have some floorplan as 20 other houses in the same 1 mile radius. While doing touristy stuff there, I saw the Baltimore harbor, had a deee-licious crab cake and observed some of the local marine life. Afterwards, a Asian wedding was to be had and if you know anything about Asian weddings, you know that at the end, you won't be hungry for days. I partook of a 12 course meal, that went on for hours. Thankfully, I shed that shyness layer a while back and I was able to socialize with a bunch of people I'd never met before and even walked out with a small gift! I also did some dancing. Well, I tried, but the music was too fast, and definitely not to my style. I only danced with 3 people the entire night. One of which was a woman who used to live in Austin and was in desparate need of some Texas style dancing. (which I was already missing) I hung out with some of peeps afterwards, and although they were cool enough (they started writing funny sayings on the Equal and pink stuff), the guys definitely don't treat outsiders as well as I'm accustomed to. ("Hey Texas. Go get me some more sugar packets.") The next day I got to play around on a carousel and witness Contra dancing. And then ahhh....back home to Dallas where I've been running around like a crazy person with his head chopped off...but still with all of his motor functions. Err...nevermind. In any case, I've been busy and am finally getting a chance to journal this. -- SnoopyKiss likes the dancing in Dallas, because DC's too fast. And the people are cooler too. Those kids and their damn fast music.
Once again, I decided to make game of this crazy world and venture off into the unknown by myself. I had the best time going by myself to a hostel, so I should have just as much fun same this time, right? Nope. My trip to Brugges was almost cancelled because there was an accident at Gare du Nord (my take off station). Luckily, an old Frenchman took me under his wings and helped me get to another Metro where I was able to make it to my train with only 5 minutes to spare. When I got to Brugges, I went to the "Johnny Rockets" hostel, because the description and name seemed fun enough. I took the taxi and walked inside the bar and asked the bartender for a room. It seemed pretty noisy, but I'm sure that I would enjoy myself. After the paperwork and credit card, I hear the words that will forever ring in my ear as The signal that you're getting a bad room. "You're in Room...1." Not knowing better at that time, I took the key and walked upstairs to the unlit, stair hallway and blindly felt myself though the door way. I finally opened up a door and the motion detector lights came on. And true enough, I was the ONLY soul there. I found my room, opened it up and plopped my stuff down and went off for a restaurant. Dinner was pretty good. I then explored Brugges and found that it's a really romantic city at night with the nicely lit buildings and waterways. Tired and full, I went back "home" and crawled in bed...going to sleep took a lot longer because I could hear the music downstairs going strong. The next day, (Unfortunately, a rainy day, but that did not douse any spirits.) I packed everything up and took a bus tour of Brugges and was quite impressed. Regrettably, I did not see it; however, in one of their buildings, they have in a metal container, the "Blood of Christ." They also have a beautiful area with a statue of Neptune in the middle. The city is surrounded by many canals, which split up the city wonderfully. Points of interests in Brugges: The main attraction is the Tower. (I forget the name.) Every 4th store is a Lace store since it is a huge tradition in their town. And inside every other lace store is a tapestry store. If I remember correctly, there are 20 tapestry factories in Europe and 9 are in Brugges. So, if you're going to get lace and tapestries, go to Brugges. After enough touring, I decided to make a change in plans and go to Brussles. Home of the EU (European Union) and my favorite tourist place so far: Mini Europe! (The leaning tower IS leaning, but the picture was taken the wrong way.) When I got into Brussles, I was completely lost (AGAIN!). I quickly found an Ibis hotel (4 stars and in the Nortel travel recommended hotels list) and plopped my weary arms and legs in bed. The next morning, I had some Belgium Waffles (very good with some chocolate syrup.); visited the Grand Market; did some window shopping; and enjoyed some of the local artwork. Afterwards, I took a bus tour to the Atomium (A 100+ meter monument built for the 1950 Olympics) and then the neatest place so far: Mini Europe. As it's name suggests, all of the monuments of Europe are shrunked and placed in this decent sized area. There's the Eiffel Tower, Sienna, off shore rigs, Brugges, Brussles, Arc du Triumph, Venice, The Berlin Wall, Greece (?), an oil repository on fire, and a lot of other places I have not been to yet. It was; however, a really great feeling to see some of the places which I have already been to and places I have yet to see. I then hopped on the tour bus again and went to see some Chinese houses which were imported to Brussles as monuments. (Most impressive.) It made me realize that Asia is the next place I want to visit. No journey to Brussles can be complete without seeing the "Manneken Pis". Legend has it that when Brussles was under attack, the king's son releaved himself on one of the attacking cannons, thus saving Belgium. A statue was created of the boy, of course...peeing. Who knew that urine could also be used to save lives? Also, the boy is dressed up in various costumes throughtout the year. (Long live the King.) At first, I thought that I would not enjoy myself as much in Belgium, since I had this thought that it was a boring country. However, Europe has not let me down yet. I continue to explore new places and enjoy myself each time I venture out into the unknown. Next weekend will be great because "Father Falgout" (aka Dad) is coming to visit for 2 weeks and we shall paint Europe red! Cheers! P.S. Here's the link to the entire album. There are lots more pictures from Mini Europe.